Campaign Creation & Logs Guide
How to Create a Campaign
Follow these 6 simple steps to create and manage your campaign.
Step 1: Create Campaign Button
Navigate to the Campaigns page and click the "Create Campaign" button located in the top right corner of the screen.
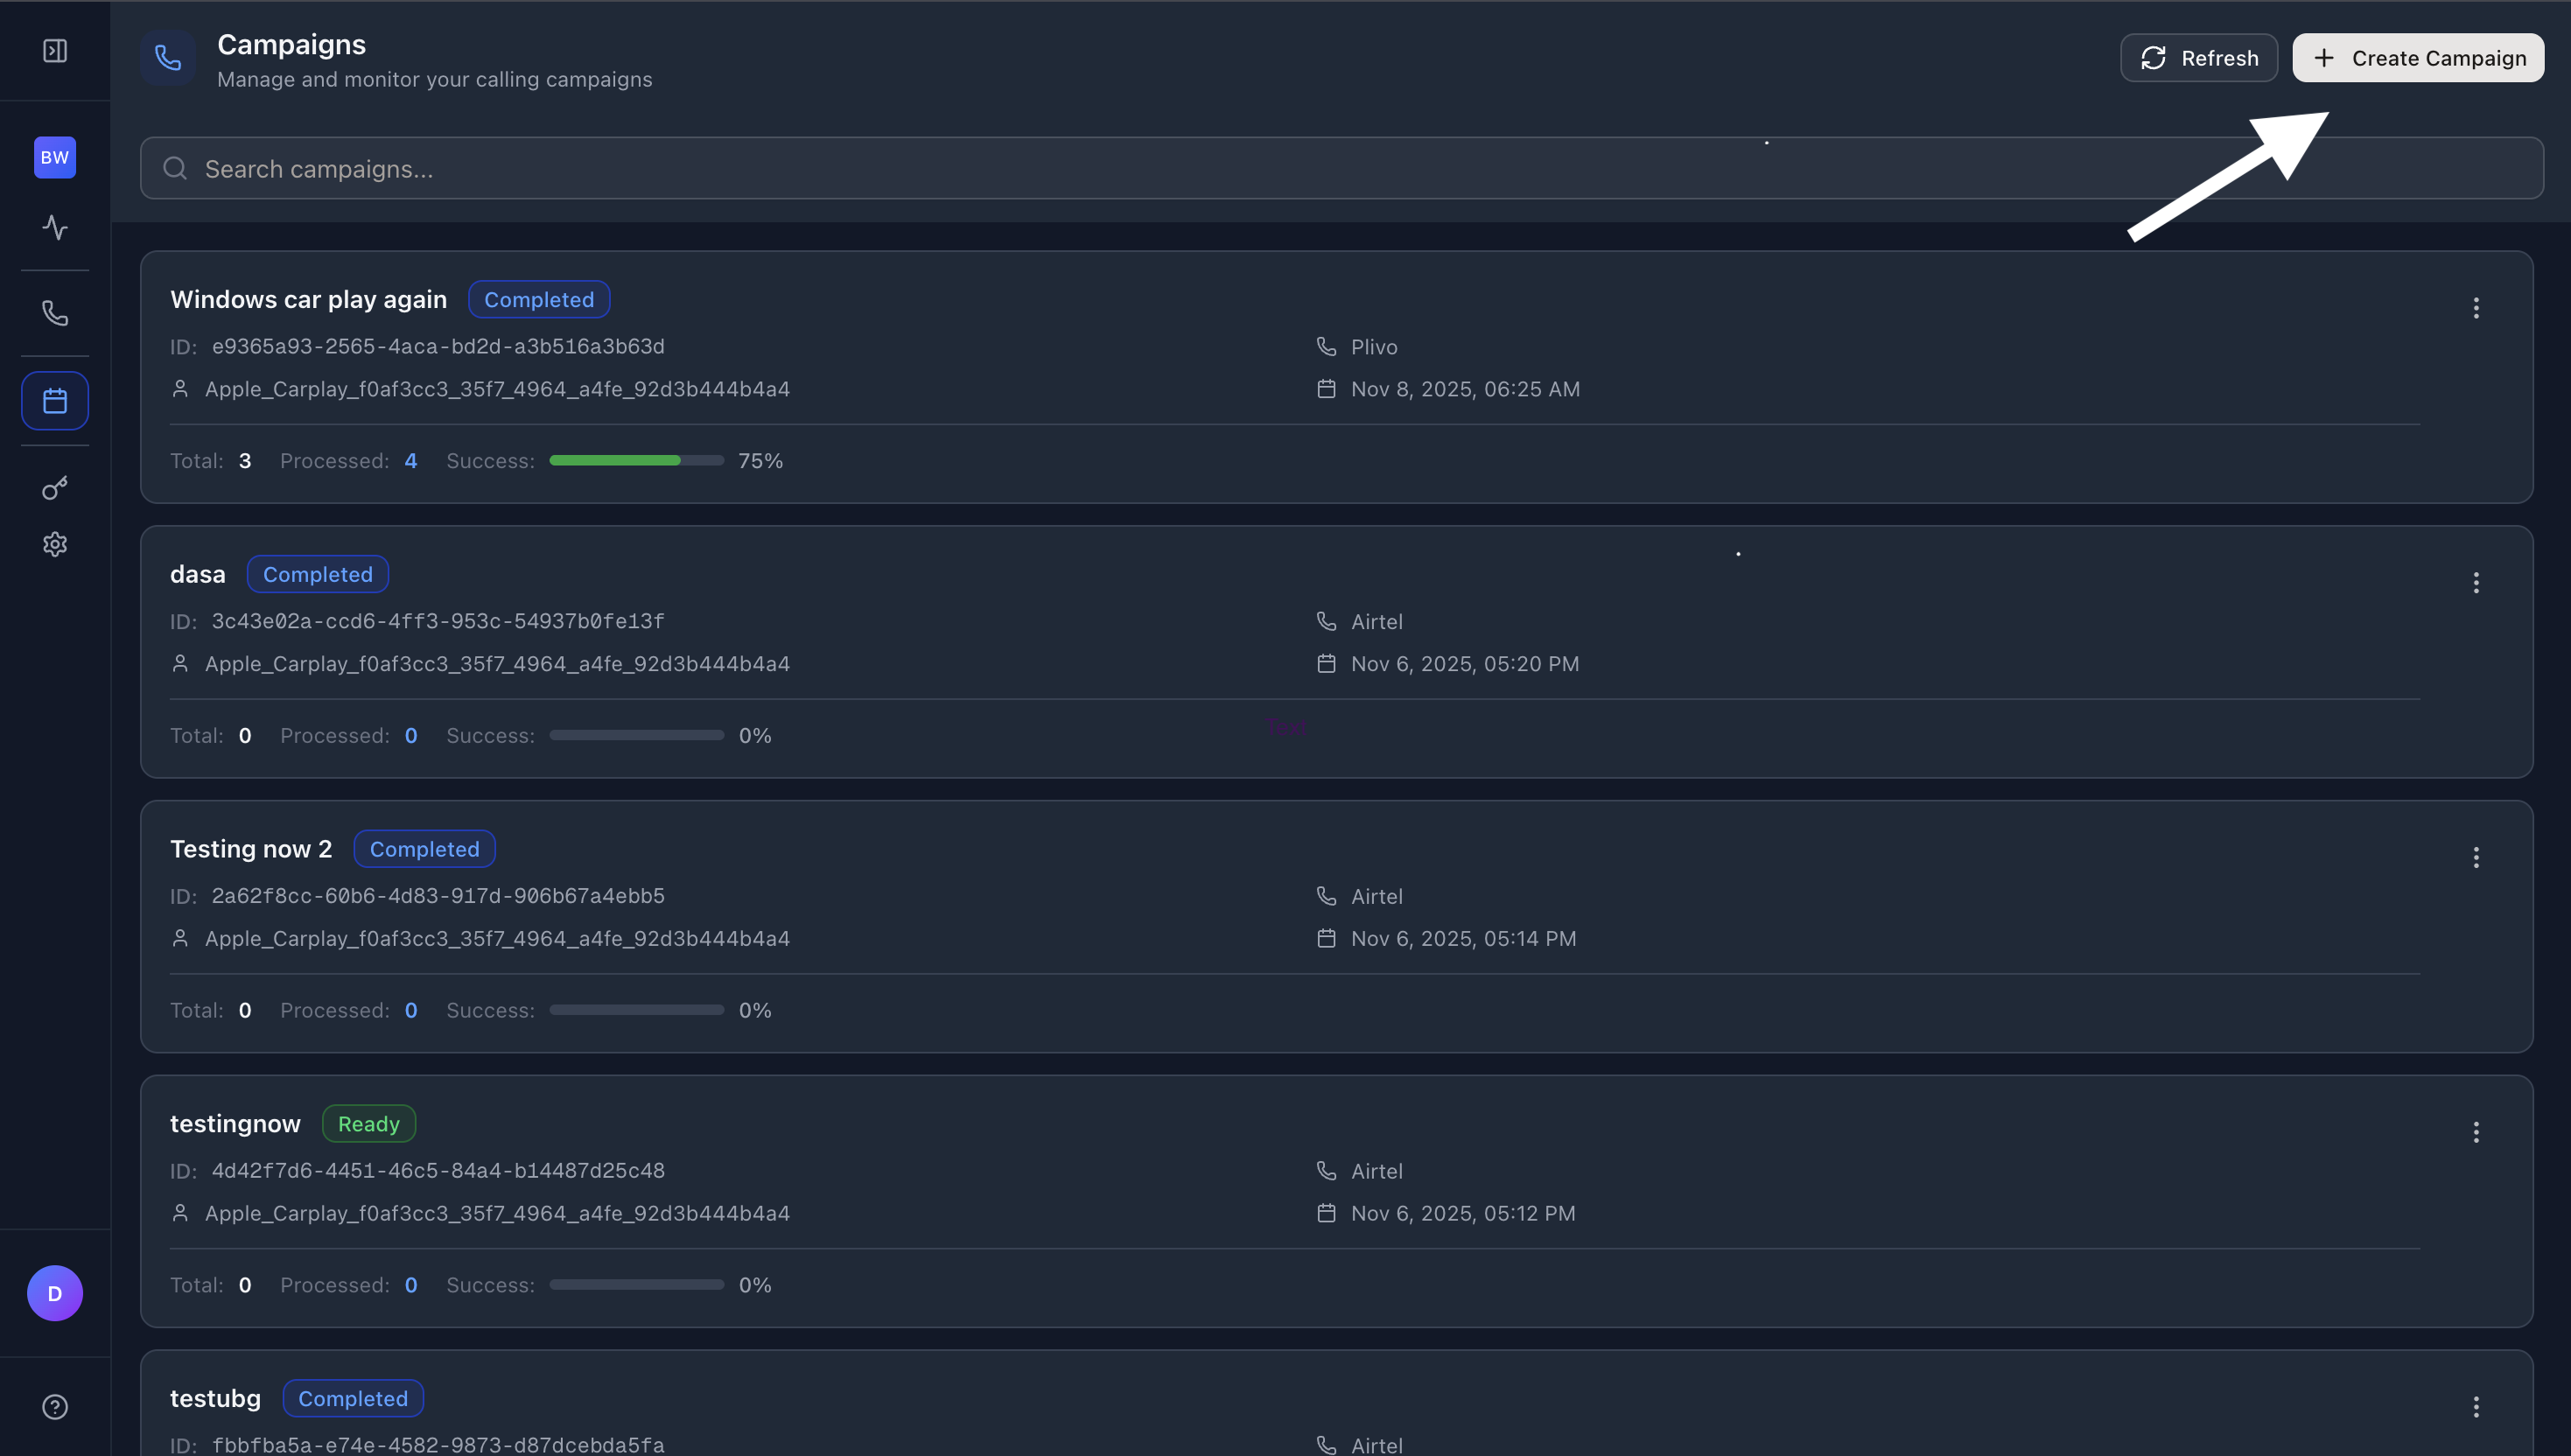
This will open the campaign creation form where you'll configure all campaign settings.
Step 2: Add Campaign Details
Fill in the basic campaign information:
- Batch Call Name - Enter a unique name for your campaign (e.g., "booking-confirmation-campaign")
- Select Agent - Choose the AI agent that will make the calls from the dropdown
- From Number (Outbound) - Select the phone number to call from
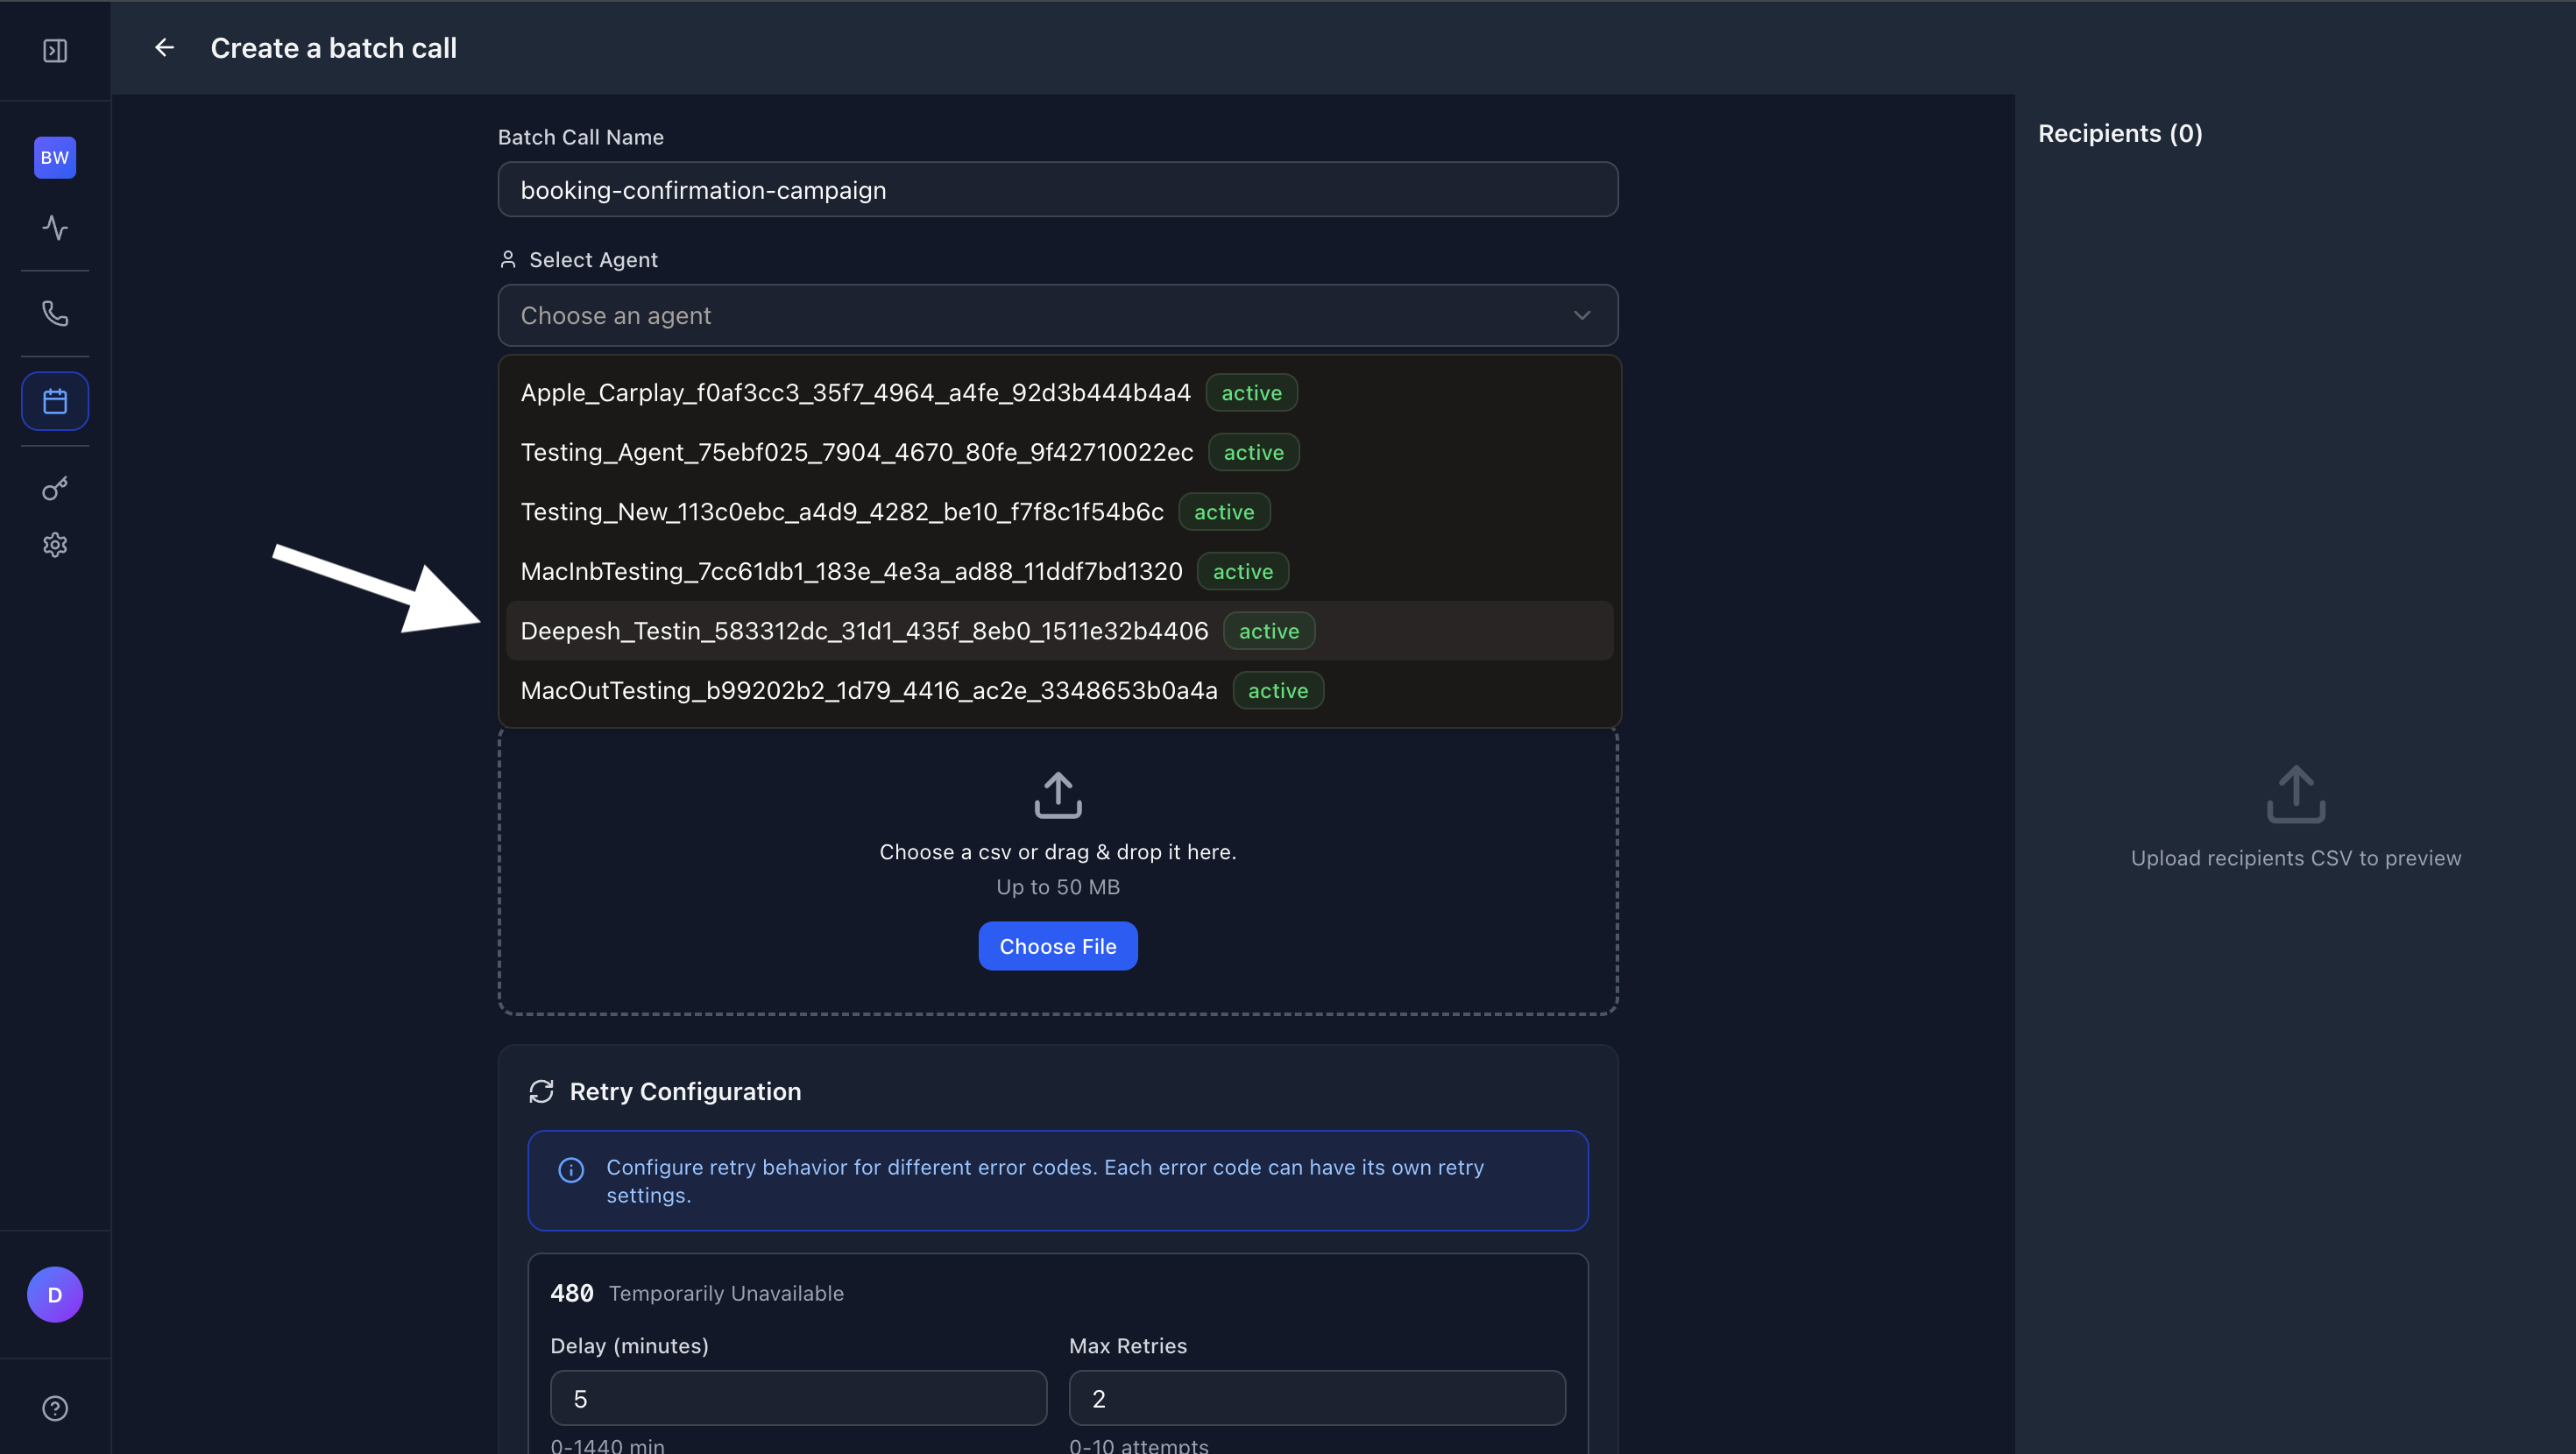
Important: Make sure to select an active agent and a valid phone number before proceeding.
Step 3: Set Campaign Concurrency
Configure how many simultaneous calls your campaign will make:
- Campaign Concurrency - Set the number of simultaneous calls (1-5)
- Recommended: 5-10 simultaneous calls for better performance
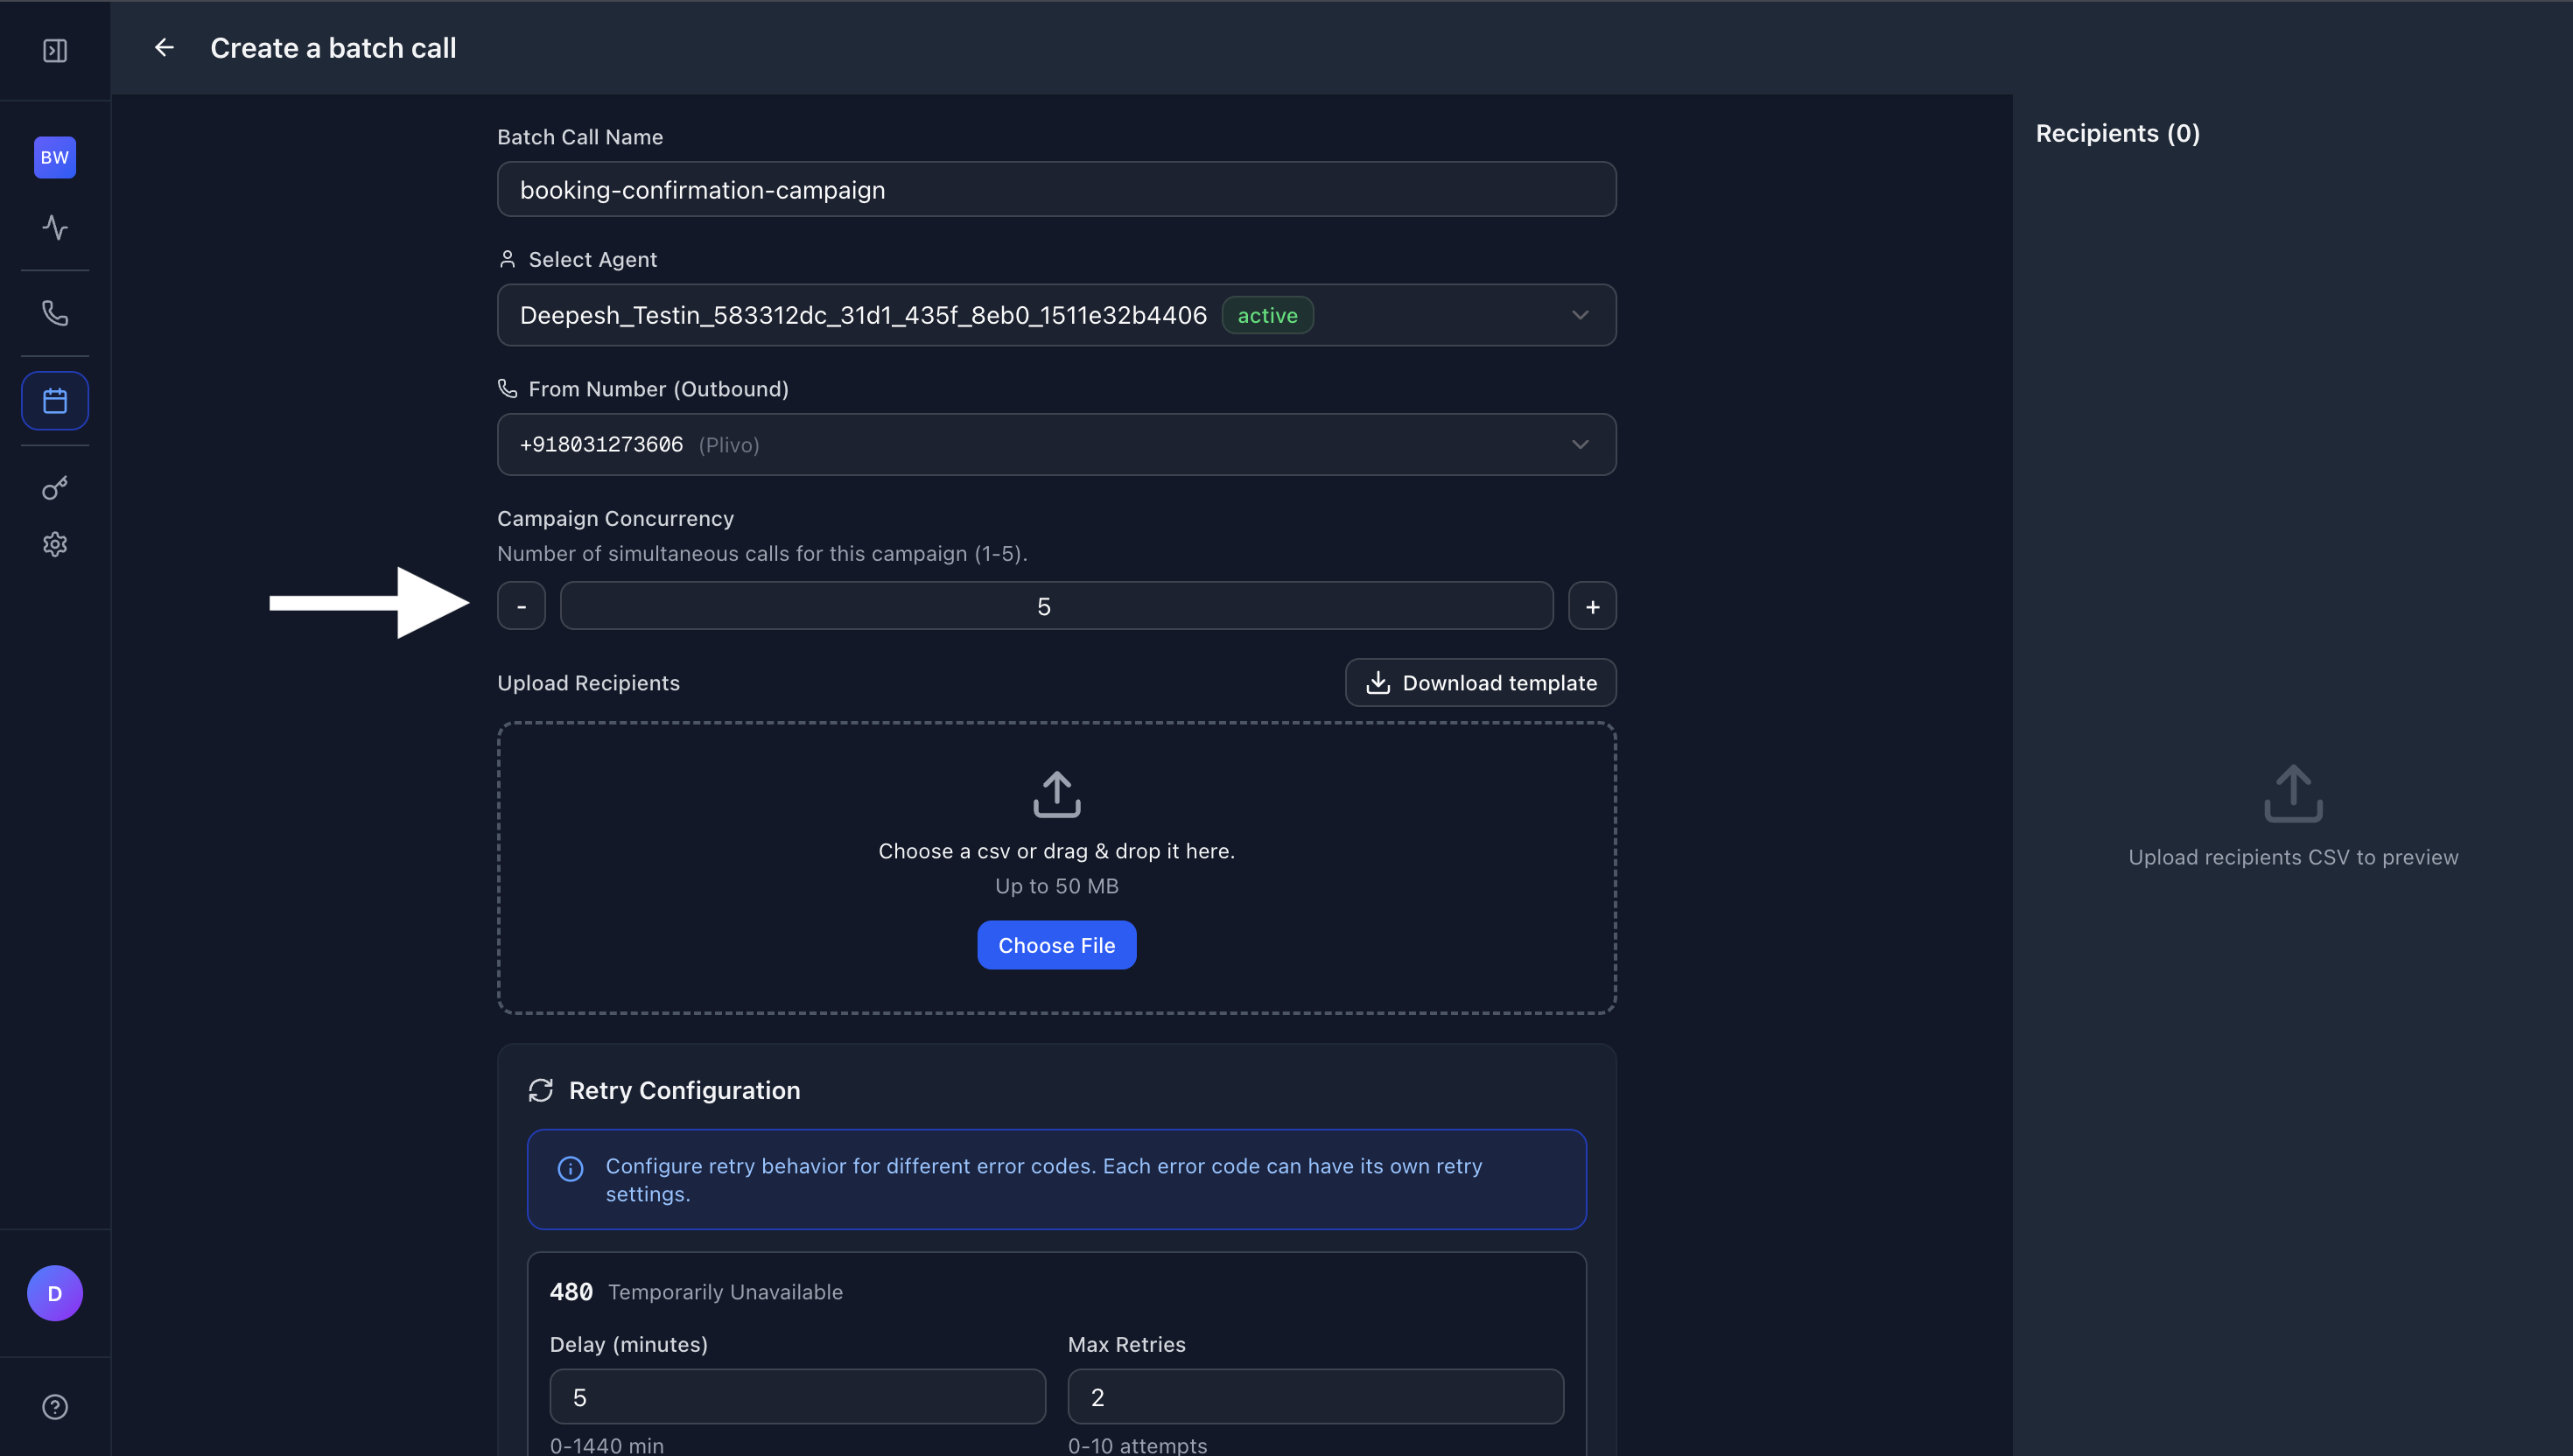
Use the - and + buttons to adjust the concurrency value. Higher concurrency means more calls will be made at the same time, but make sure your account limits allow it.
Step 4: Upload Recipients CSV
Upload your CSV file containing recipient information:
CSV File Requirements
- Required Column:
phone- Must contain phone numbers - Variable Columns: All other columns become variables that you can use in your agent's prompt
- Column Names: Must match exactly with the variable names used in your prompt
CSV Format
phone,NAME,SLOT,DOCTOR
+916268181226,deepesh agrawal,2-3 PM,rajesh rao
Important Points:
- The
phonecolumn is required and must contain valid phone numbers - Other column names (like
NAME,SLOT,DOCTOR) become variables you can use in your prompt - Column names must match exactly with the variables in your agent's prompt
- Use
{{COLUMN_NAME}}format in your prompt to reference these variables
Download Template
Click the "Download template" button to see an example CSV format with the correct structure.
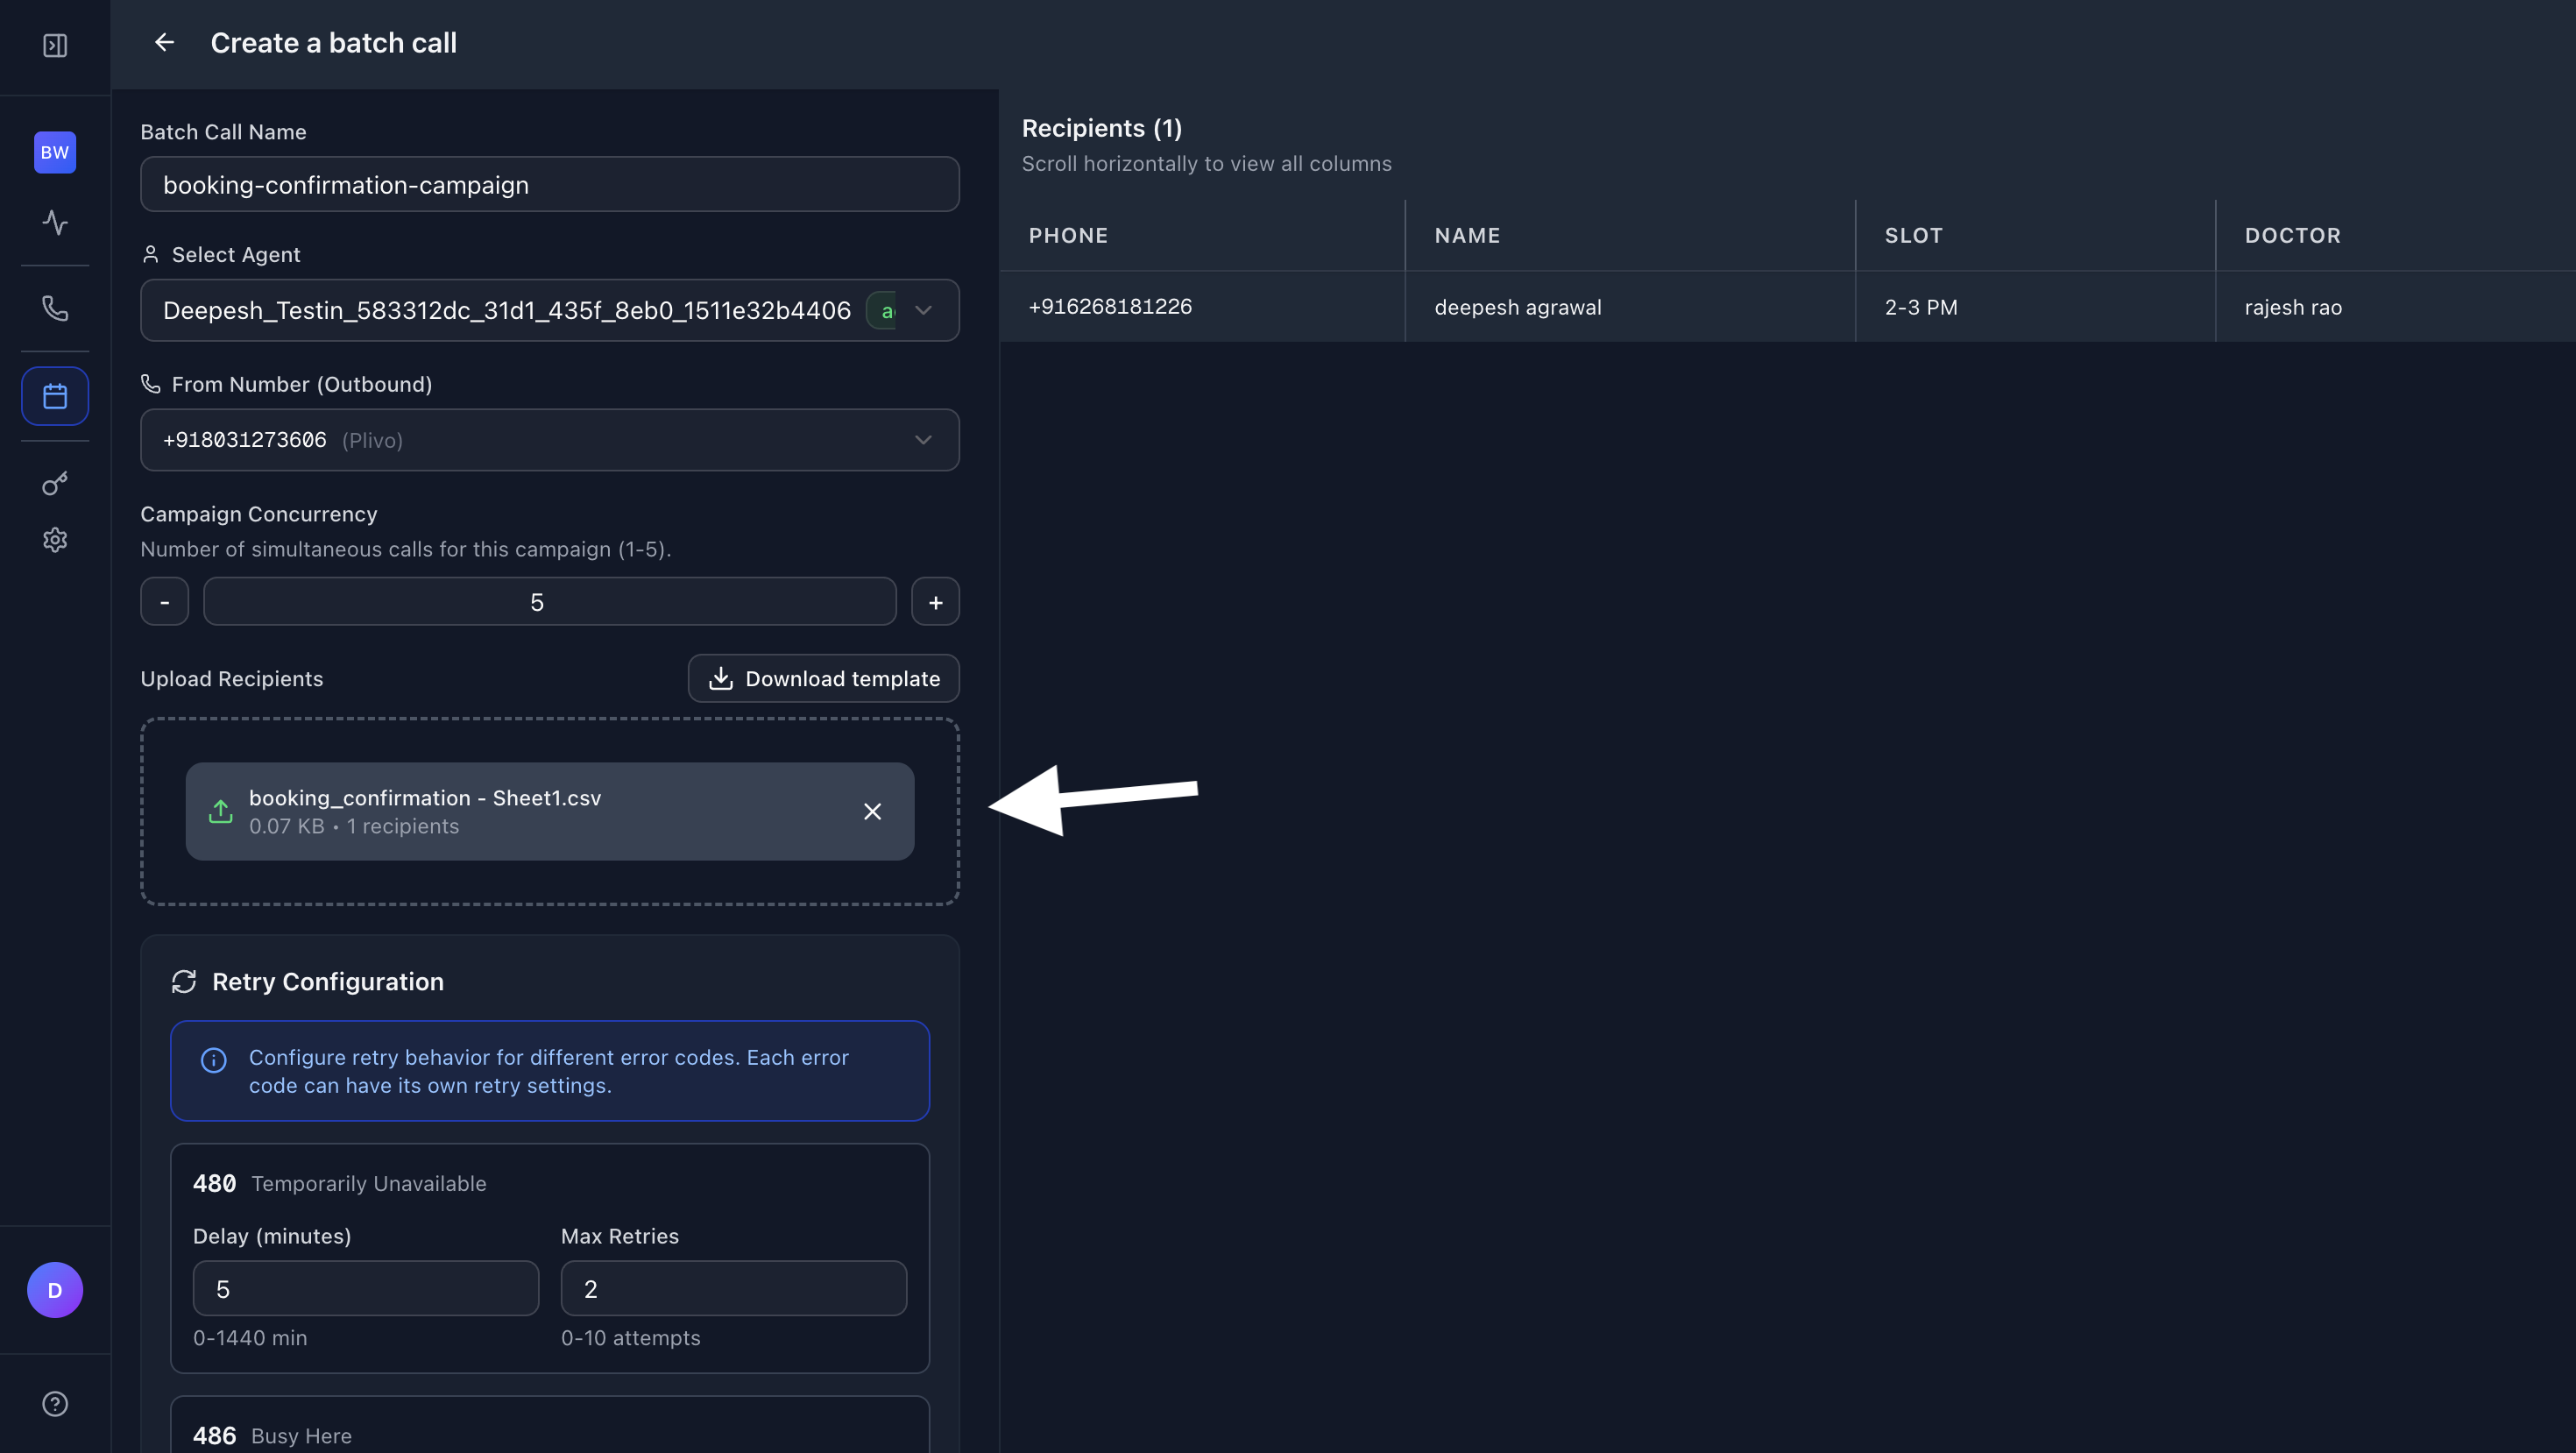
After uploading, you'll see a preview of your recipients in the right panel showing all columns and data.
Step 5: Configure Campaign Settings
Set up the final campaign settings:
Retry Configuration
Configure automatic retries for failed calls:
-
480 Temporarily Unavailable
- Delay (minutes): Wait time before retry (0-1440 minutes)
- Max Retries: Number of retry attempts (0-10)
- Default: 5 minutes delay, 2 retries
-
486 Busy Here
- Delay (minutes): Wait time before retry (0-1440 minutes)
- Max Retries: Number of retry attempts (0-10)
- Default: 5 minutes delay, 2 retries
When to Send
- Send Now - Start the campaign immediately
- Schedule - Schedule the campaign for a later time
Days to Run
Select which days of the week the campaign should run:
- Weekdays (Mon-Fri)
- Weekends (Sat-Sun)
- All days
- Custom selection
Call Window
Set the time range when calls should be made:
- Start Time - When to begin making calls (e.g., 12:00 AM)
- End Time - When to stop making calls (e.g., 11:59 PM)
Calls will only run between these hours on the selected days.
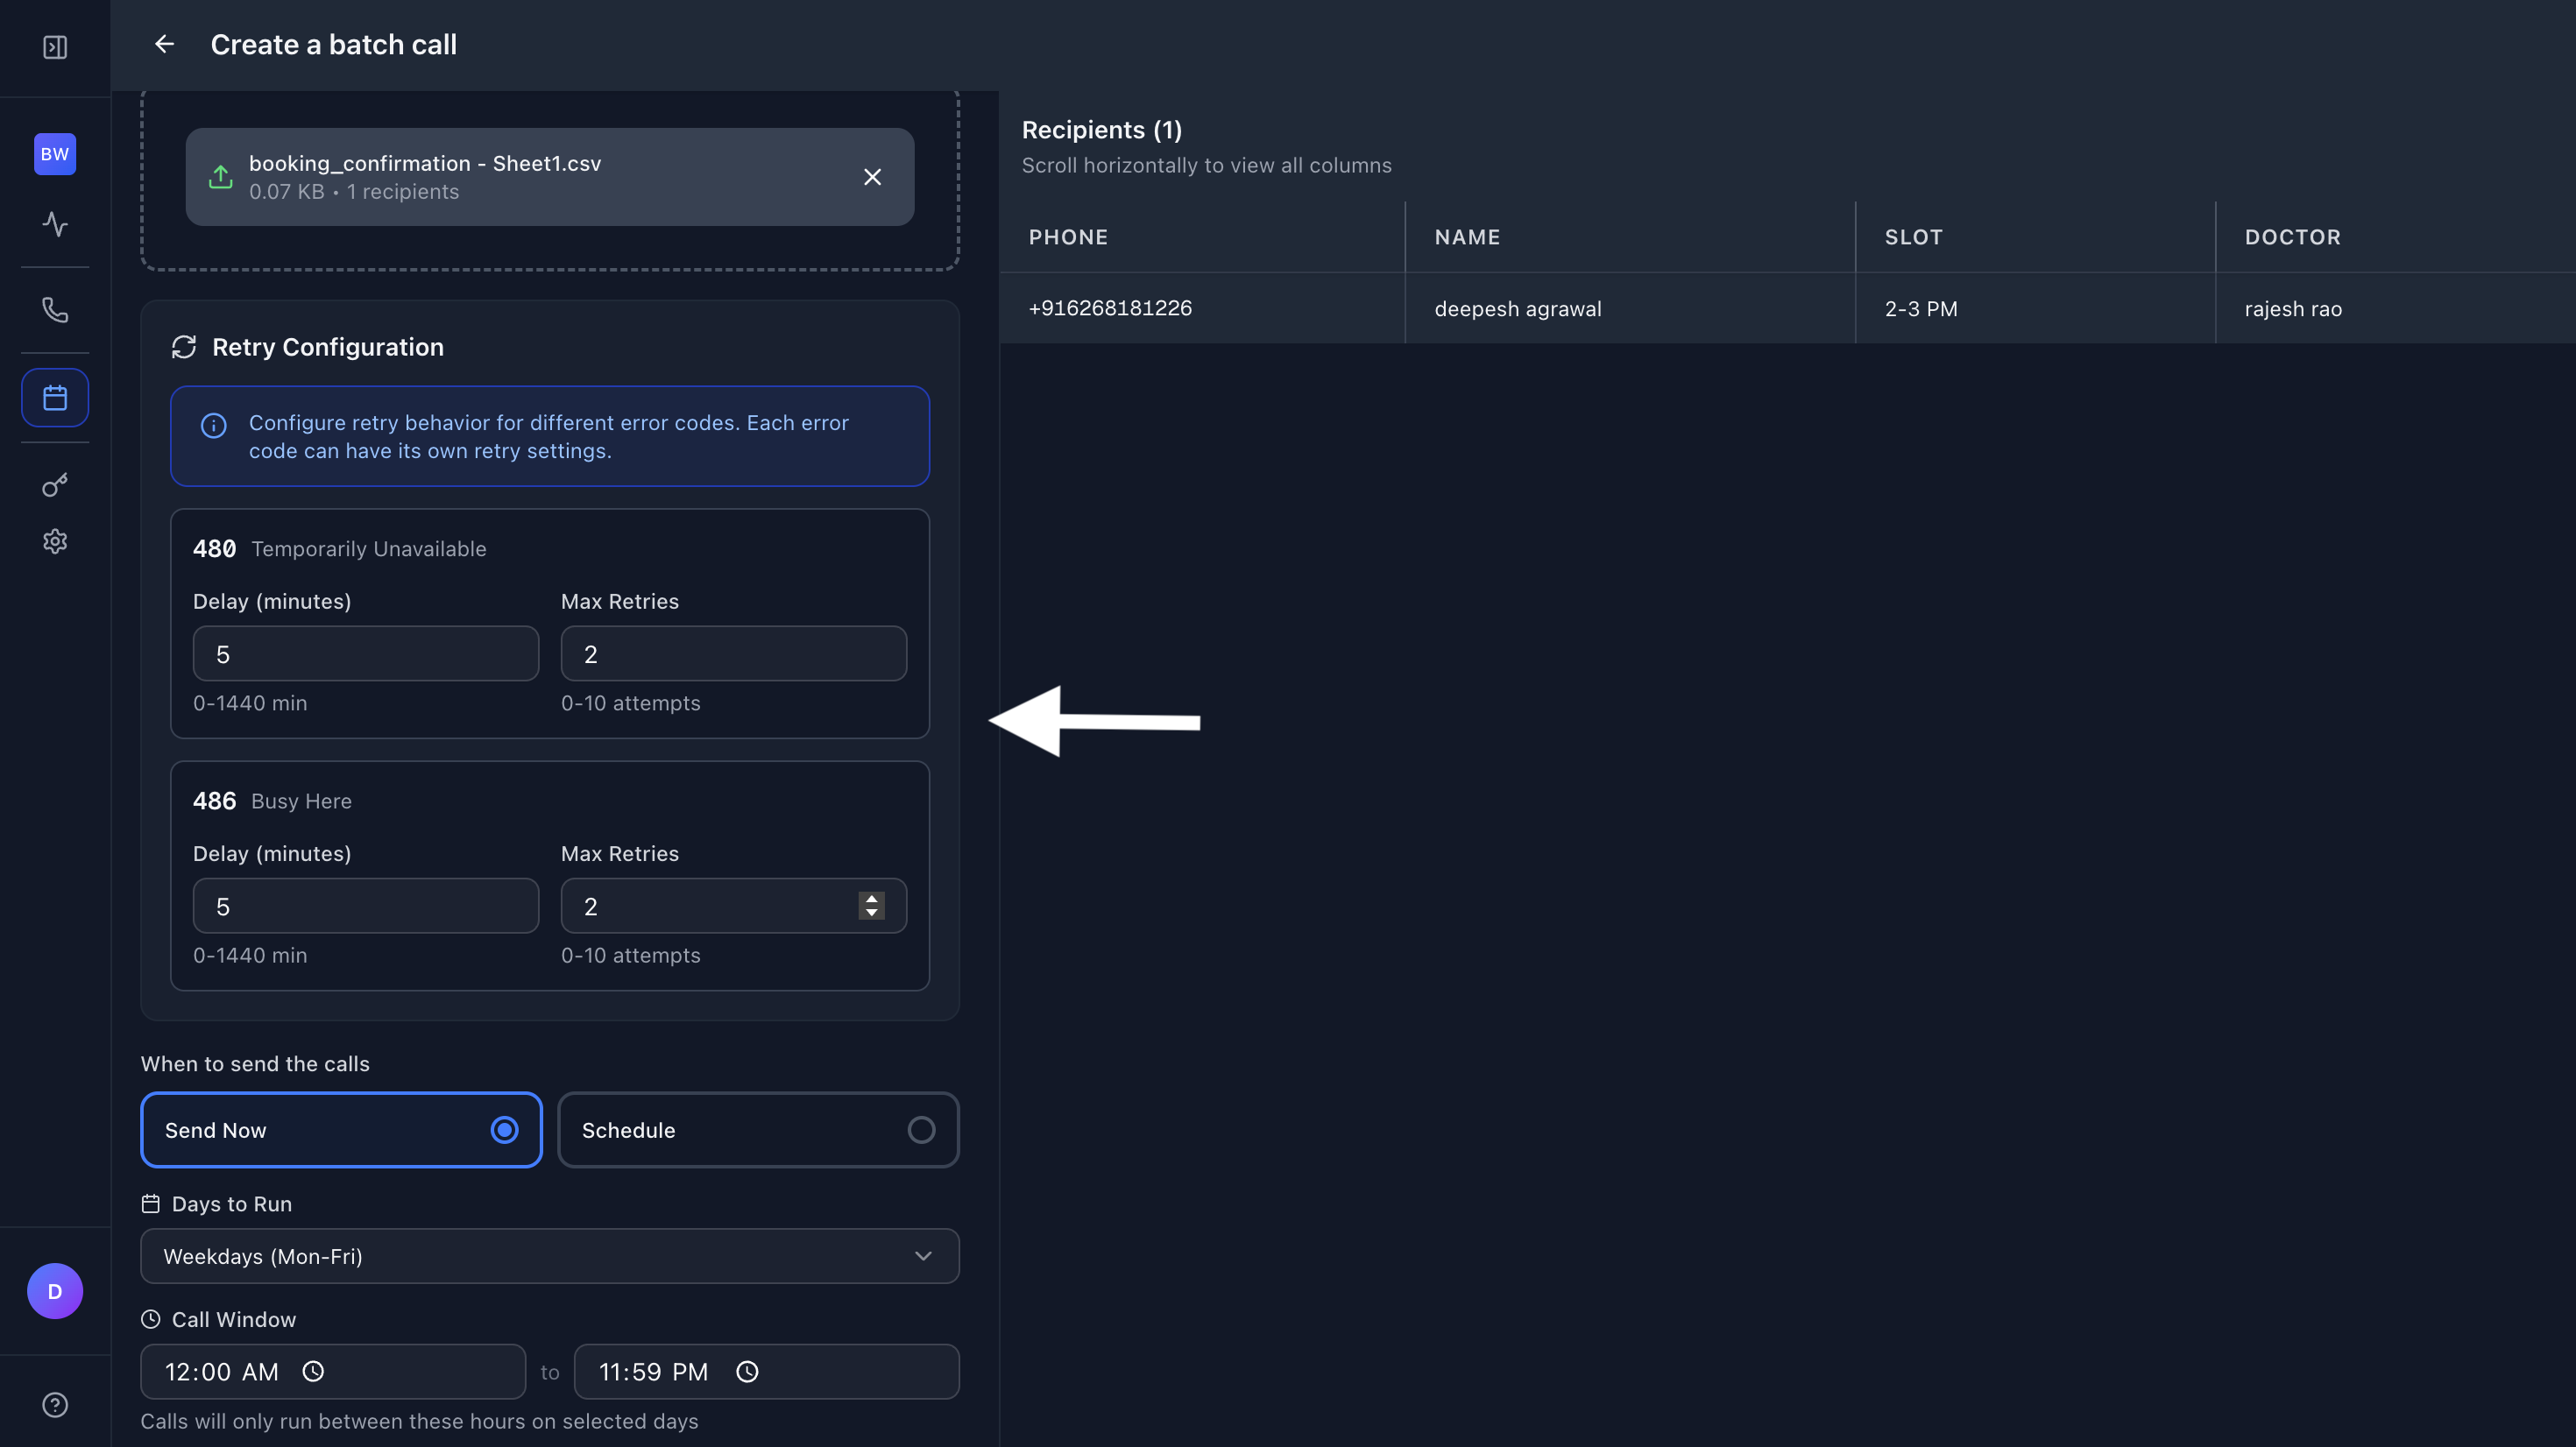
Once all settings are configured, click the "Send" button to create and start your campaign.
Step 6: View Campaign Logs
After creating the campaign, you'll be automatically redirected to the Campaign Logs page where you can monitor the campaign status.
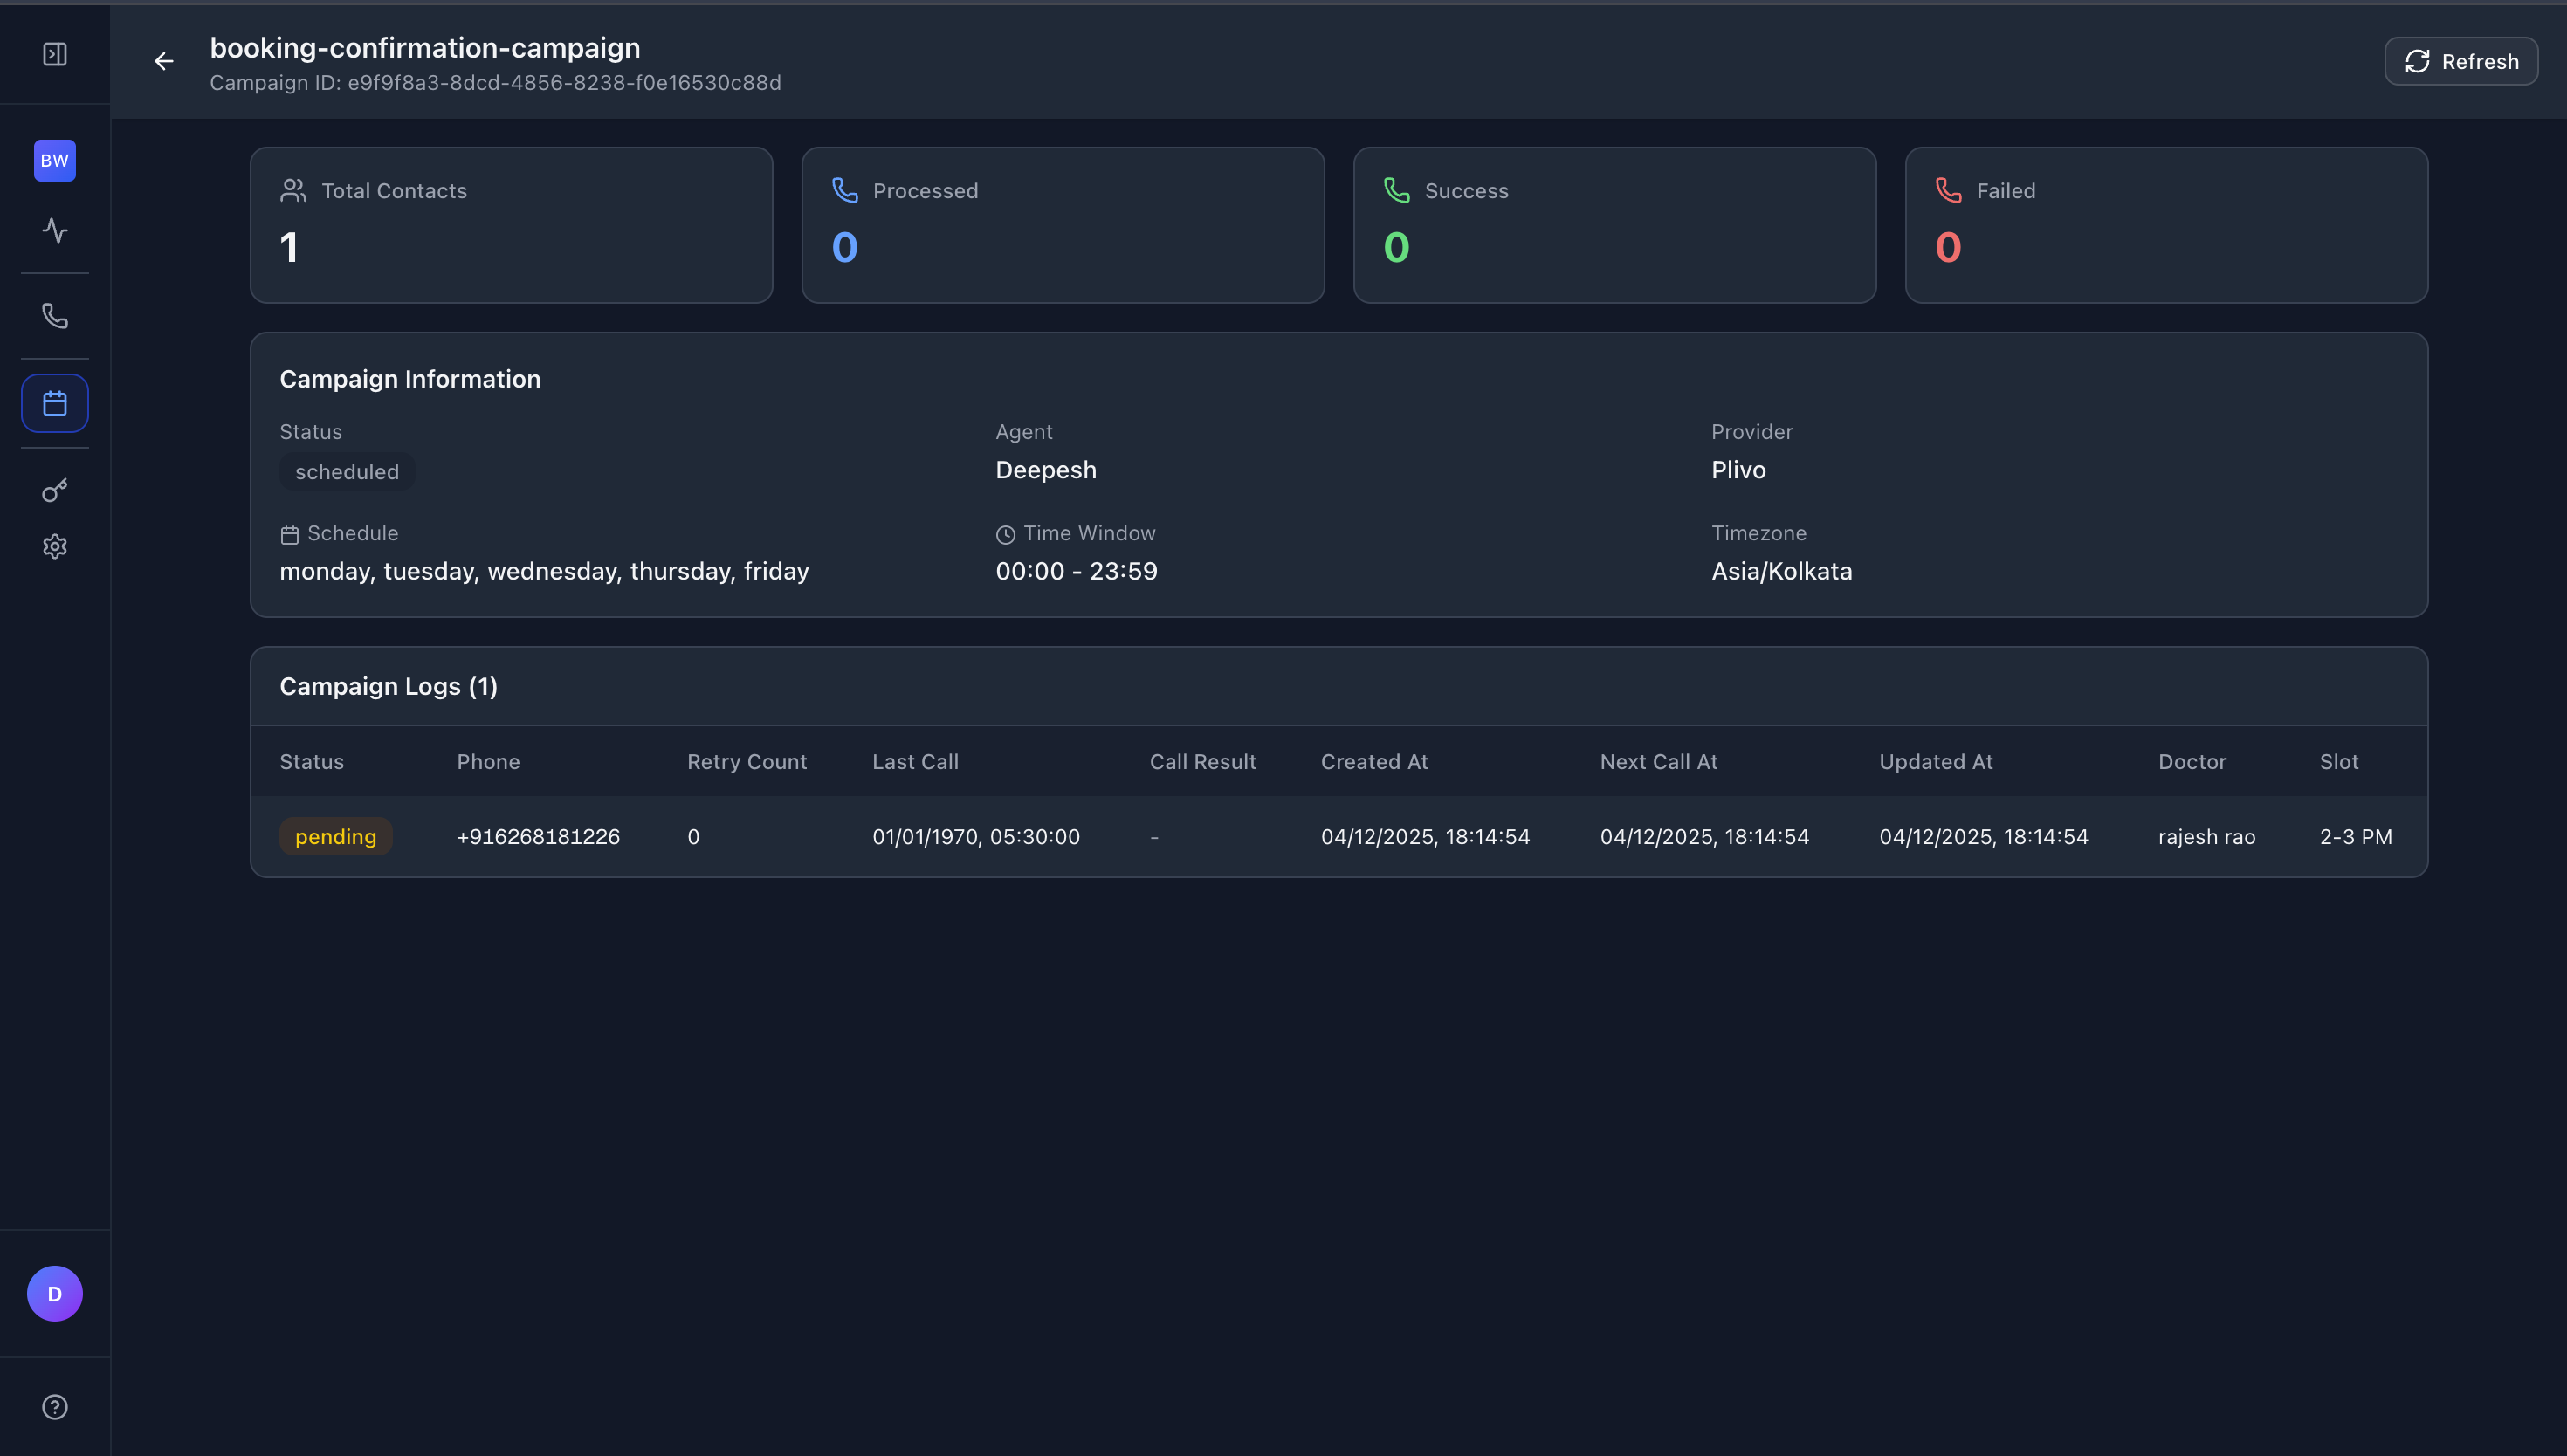
Campaign Overview
The page displays:
-
Campaign Statistics - Four key metrics:
- Total Contacts - Total number of recipients
- Processed - Number of contacts processed
- Success - Number of successful calls
- Failed - Number of failed calls
-
Campaign Information - Shows:
- Campaign status (scheduled, active, completed)
- Schedule details (days and time window)
- Agent name
- Provider information
- Timezone
-
Campaign Logs Table - Detailed view of each contact:
- Status - Current call status (pending, in progress, completed, failed)
- Phone - Contact's phone number
- Retry Count - Number of retry attempts
- Last Call - Timestamp of last call attempt
- All CSV columns - Your variables displayed as columns (NAME, SLOT, DOCTOR, etc.)
Understanding Status
- Pending (Orange) - Waiting to be called
- In Progress (Blue) - Call currently active
- Completed (Green) - Call successful
- Failed (Red) - Call failed after all retries
Understanding Variables
How Variables Work
Variables allow you to personalize each call using data from your CSV file.
Example:
If your CSV has columns: phone, NAME, SLOT, DOCTOR
phone,NAME,SLOT,DOCTOR
+916268181226,deepesh agrawal,2-3 PM,rajesh rao
In your agent's prompt, use:
Hello {{NAME}}, your appointment with {{DOCTOR}} is scheduled for {{SLOT}}.
The system will automatically replace:
{{NAME}}with "deepesh agrawal"{{DOCTOR}}with "rajesh rao"{{SLOT}}with "2-3 PM"
Important Rules
- Column names = Variable names - The column name in your CSV must match the variable name in your prompt
- Case sensitive -
{{NAME}}and{{name}}are different - Exact match required - Column name must match variable name exactly
- Use double curly braces - Format:
{{VARIABLE_NAME}}
CSV File Format
Required Format
phone,COLUMN1,COLUMN2,COLUMN3
+916268181226,value1,value2,value3
+919876543210,value1,value2,value3
Phone Number Format
- Must start with country code:
+91(India) or+1(US/Canada) - Followed by 10 digits
- Examples:
- Valid:
+916268181226 - Valid:
+919876543210 - Invalid:
916268181226(missing +) - Invalid:
+91-626-818-1226(wrong format)
- Valid:
Column Naming Rules
- Use letters, numbers, and underscores:
patient_name,appointment_date - Keep it simple:
NAME,SLOT,DOCTOR - Avoid spaces: Use
first_namenotfirst name - Avoid special characters: Only letters, numbers, and underscores
Quick Reference
Campaign Creation Checklist
- Unique campaign name entered
- Agent selected
- Phone number selected
- Concurrency set (5-10 recommended)
- CSV file uploaded with
phonecolumn - CSV columns match prompt variables
- Retry configuration set
- Schedule configured (when to send, days, call window)
- Campaign created successfully
Common Issues
Issue: Variables not working in prompt
- Solution: Ensure CSV column names match variable names exactly (case-sensitive)
Issue: CSV upload fails
- Solution: Check that
phonecolumn exists and phone numbers are in correct format
Issue: Campaign not starting
- Solution: Verify agent is selected, phone number is valid, and schedule is configured correctly
Next Steps
After creating your campaign:
- Monitor the Campaign Logs page for real-time updates
- Check status of individual contacts
- Export logs if needed for analysis
- Review failed calls and adjust retry settings if necessary
For more information on managing campaign logs, see the Campaign Logs documentation.